This topic is part of a series of articles about the Precisely Customer Community. For the complete list of topics, please visit: How to Access and Use the Precisely Customer Community
There are many resources available on the Precisely Customer Community & Precisely Partner Community to answer your questions and resolve any issues you may be experiencing. However, you can still contact the Support team directly by opening a Case.
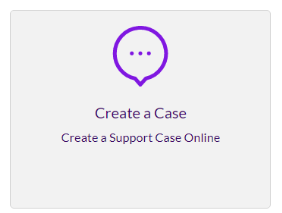
To create a new Case, select the Create a Case tile on the Support Homepage :
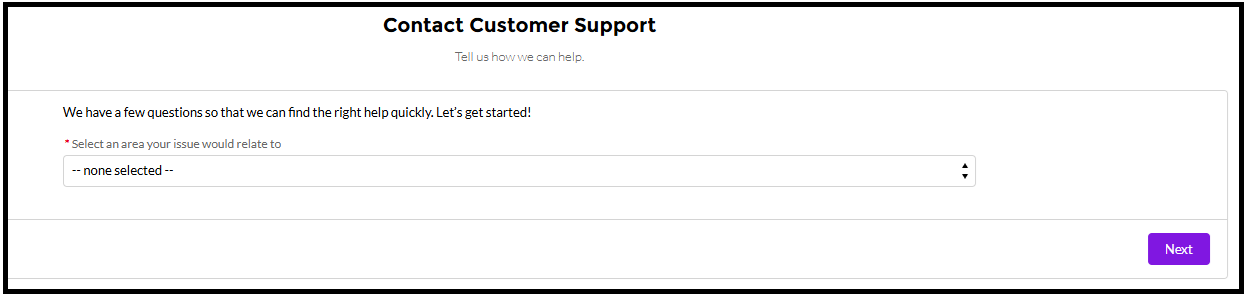
On the next screen, select the area of support in the field presented. This is your Issue Area :
-
A new box will appear. You can select one of the available options that best describes your issue. This is your Issue Statement.
-
Select Next.
-
Depending on your Issue Area and Issue Statement, relevant questions will appear requesting specific information. All cases will need a Brief Headline Summary and Full Details of Your Request.
-
Provide a brief description of your issue in the Brief Headline Summary
-
Provide additional details within the Full Details of Your Request field. Any individuals requiring case updates should be included with a "case team" request: Add Users to Cases via Case Teams
-
Populate any other remaining fields.
-
If you have supporting documentation, select the Supporting Documentation Box. You will be asked to upload the file later in the Case Creation Process.
-
Select Next.
-
Review the suggested Knowledge Articles in the These Resources might help section. The suggestions are tailored to your case details. You can select an article title at any time to view more information.
-
Select Abandon Request if a solution was found or Create Case to continue. Both options appear at the bottom of the page.
-
To attach documentation, select the Upload File option. For a list of required documentation, please refer to the Software Maintenance Handbook on support.precisely.com.
-
Once you have entered all your support information, select the Submit button.
-
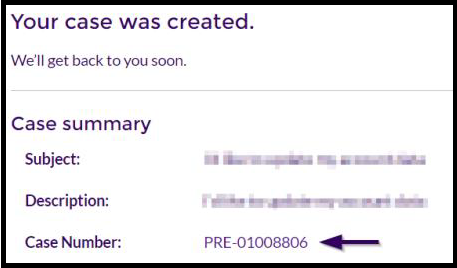
Upon submitting, you will see a success message and will receive an email with your new Case Number. Select the Case Number to see the latest information. You can also access this information from the My Support Cases view.
-
Please don't reply to the Case Open, Case Update, or Case Close emails from Precisely Support No-Reply, as the Support Engineer will not receive them, and they will not update the case. Please log in to provide updates to the Support Engineer, which will update the case and notify the Support Engineer.