This topic is part of a series of articles about the Precisely Customer Community. For the complete list of topics, you can visit: How to Access and Use the Precisely Customer Community.
For self-registration option(s), you can visit Register Your Community User Account.
This functionality is limited to the Primary and Secondary Administrator on an Account where Precisely Customer Support has provided your login with administrative privileges. You can create a new Contact for your Account so they can access the Precisely Customer Community. Note that once the Contact has been successfully associated with a Support Site Account, they will receive a welcome email to complete their login setup. If you create a contact with a Primary or Secondary role and they need administrative privileges, please contact Precisely Customer Support with the details of the user who needs them. If you need to remove the administrative privileges for a contact, please don't hesitate to contact Precisely Customer Support.
Open the Business Account you are related to.
You can achieve this by following these steps
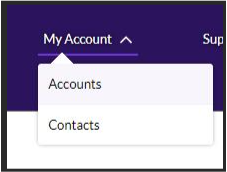
- Select My Account from the menu
- Select Accounts
- Select My Account from within the page
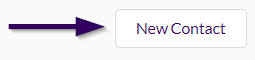
- Select the Account you want to create the Contact against
- Under the Related Contacts component, select the New Contact button.
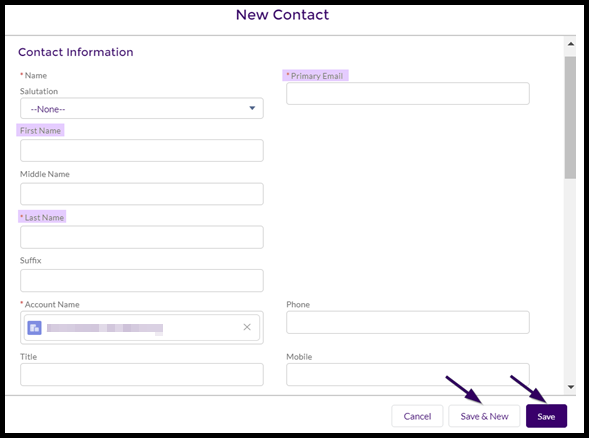
In the pop-up window, enter (at least) the First Name, Last Name, and Primary Email. Note that the email address entered must be unique across all Contacts in your Account.
If you are creating multiple Contacts at a time, select the Save & New button. If you are creating only one Contact, select the Save button to close the pop-up window and save the Contact information.
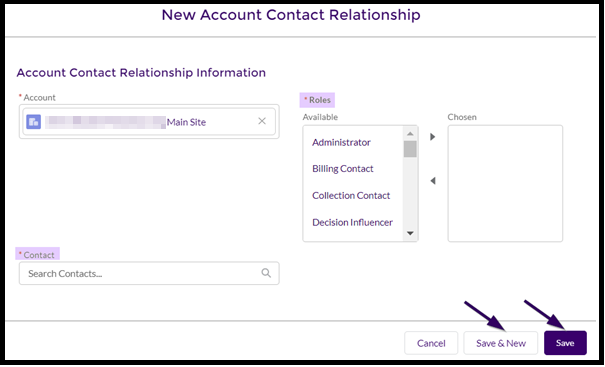
Next, you'll need to relate the new Contact to a Support Site Account. Locate the relevant Support Site Account (the name will be in the format of either [Business Account Name] Main Site or [Business Account Name] – Legacy Syncsort ID – Main Site) and select the "Add Relationship" button in the Related Contacts section.


In the pop-up window, search for the name of the Contact to add to the Support Site and select the appropriate Contact Role. Make sure to choose the arrow to move the selected Role from the Available column to the Chosen column.
-
Please select at least one Contact Role to save.
-
The Contact Role “Primary” can only be used once per Support Site, but there is no limit to the number of Contacts using any other Role.
If you are adding multiple Contacts at a time, select the Save & New button. If you are adding only one Contact, select the Save button to close the pop-up window and save the Contact information.
When the Account Contact Relationship is successfully saved, the new Contact will receive an email to complete their login setup.
For the Partner Community, a support case must be raised if a new contact needs to be created and access to the Partner Community granted.